Overview
Striim is a next generation Cloud Data Integration product that offers change data capture (CDC) enabling continuous replication from popular databases
such as Oracle, SQLServer, PostgreSQL and many others.
In addition to CDC connectors, Striim has hundreds of automated adapters for file-based data (logs, xml, csv), IoT data (OPCUA, MQTT), and applications such as Salesforce and SAP. Our SQL-based stream processing engine makes it easy to
enrich and normalize data before it’s written to targets like BigQuery and Snowflake.
Traditionally Data warehouses that required data to be transferred use batch processing but with Striim’s streaming platform data can be replicated in real-time efficiently.
Securing the in-flight data is very important in any real world application. A jump host creates an encrypted public connection into a secure environment.
In this tutorial, we’ll walk you through how to create a secure SSH tunnel between Striim cloud and your on-premise/cloud databases with an example where data is streamed securely from PostgreSQL database into Google
BigQuery through SSH tunneling.
Core Striim Components
PostgreSQL Reader: PostgreSQL Reader uses the wal2json plugin to read PostgreSQL change data. 1.x releases of wal2jon can not read transactions larger than 1 GB.
Stream: A stream passes one component’s output to one or more other components. For example, a simple flow that only writes to a file might have this sequence
BigQueryWriter: Striim’s BigQueryWriter writes the data from various supported sources into Google’s BigQuery data warehouse to support real time data warehousing and reporting.
Step 1: Configure your jump server
For this recipe, we will host our app in Striim Cloud but there is always a free trial to visualize the power of Striim’s Change Data Capture.
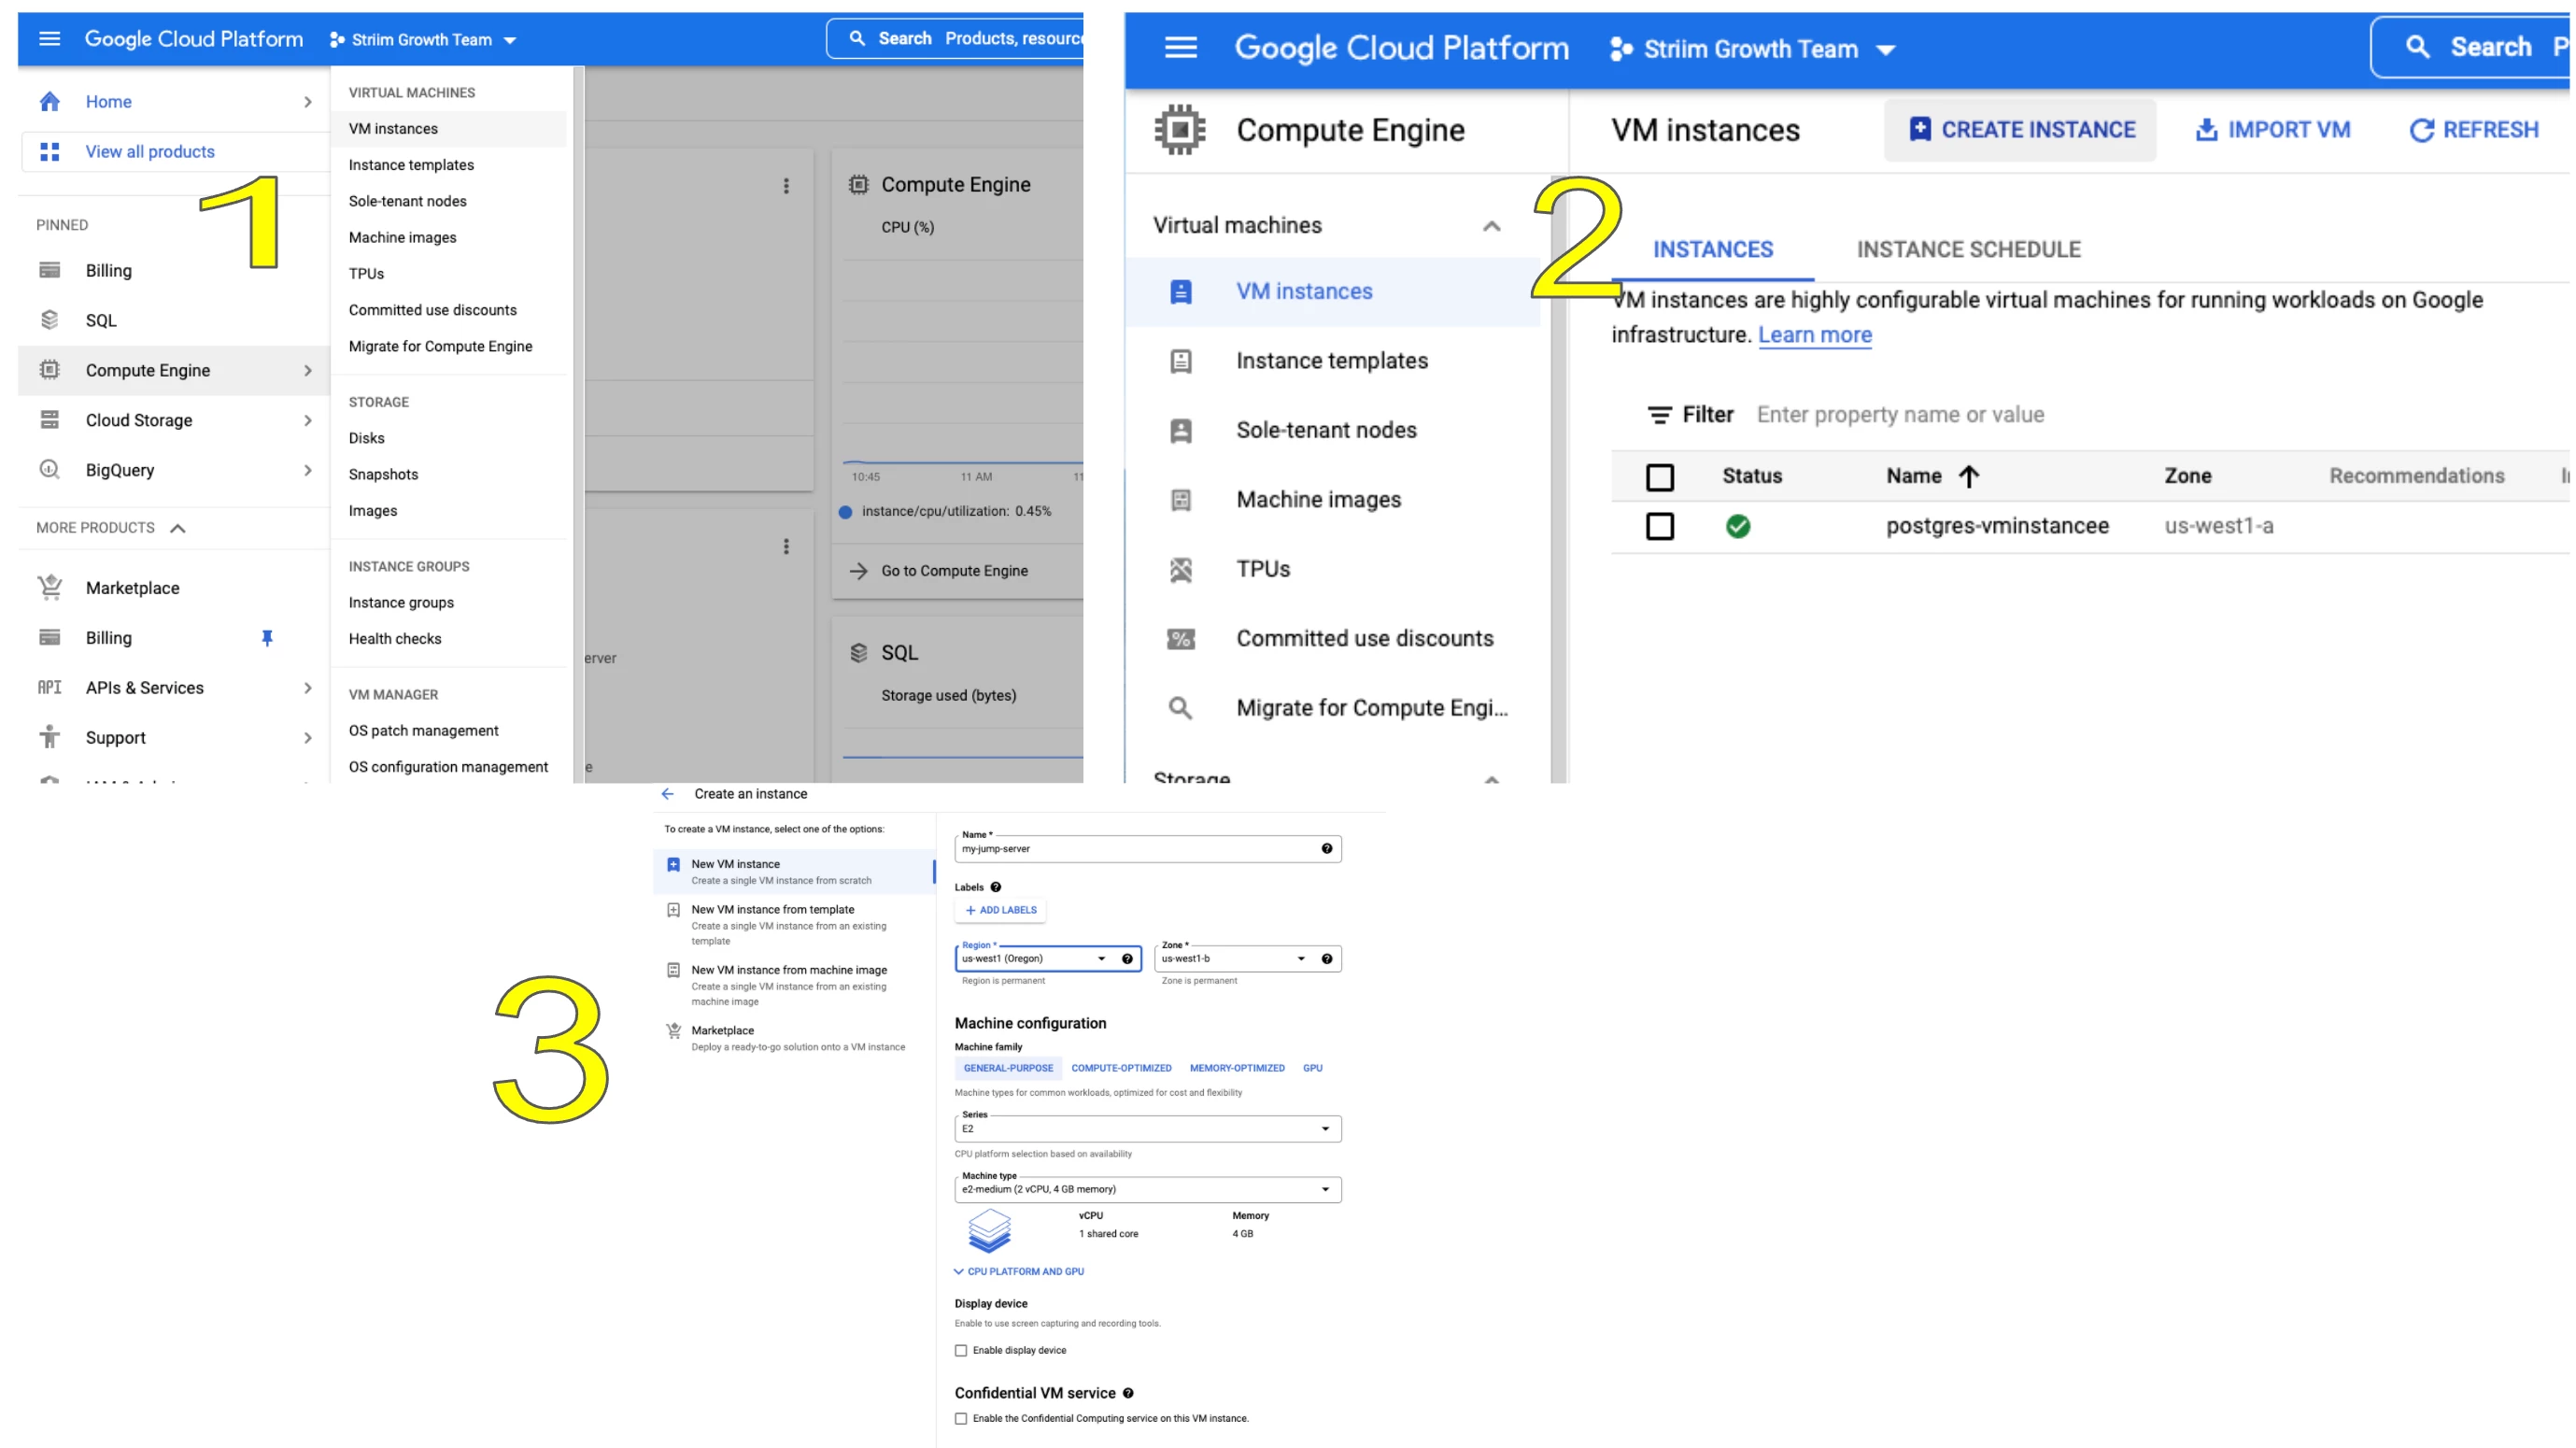
Follow the steps below to set up your jump server on Google Compute Engine:
Go to google cloud console -> Compute Engine -> VM instances and create a new VM instance that would act as the jump server.
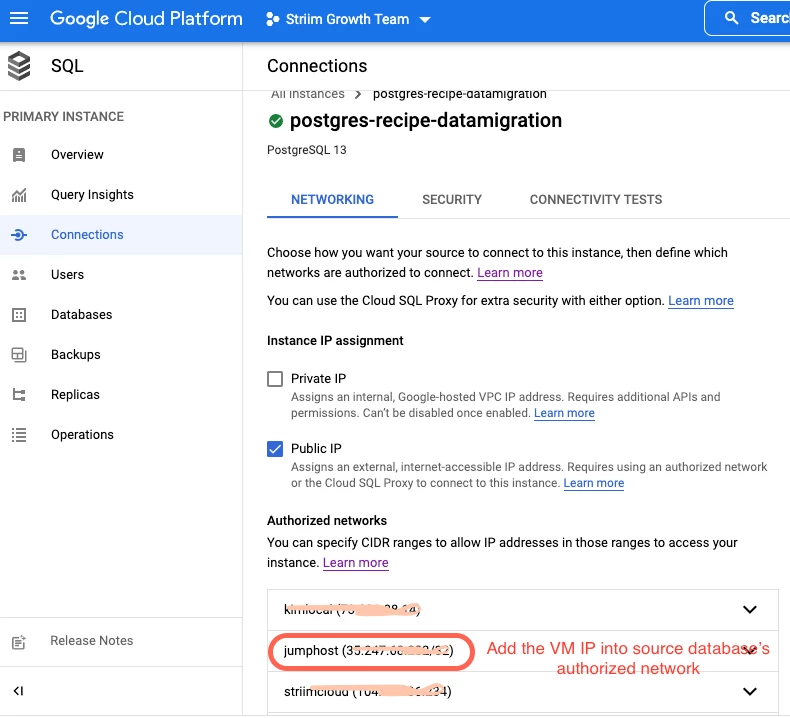
Add the jump server’s IP address to authorized networks of source database, in this case postgres instance
Step 2: Create SSH tunnel on Striim Cloud
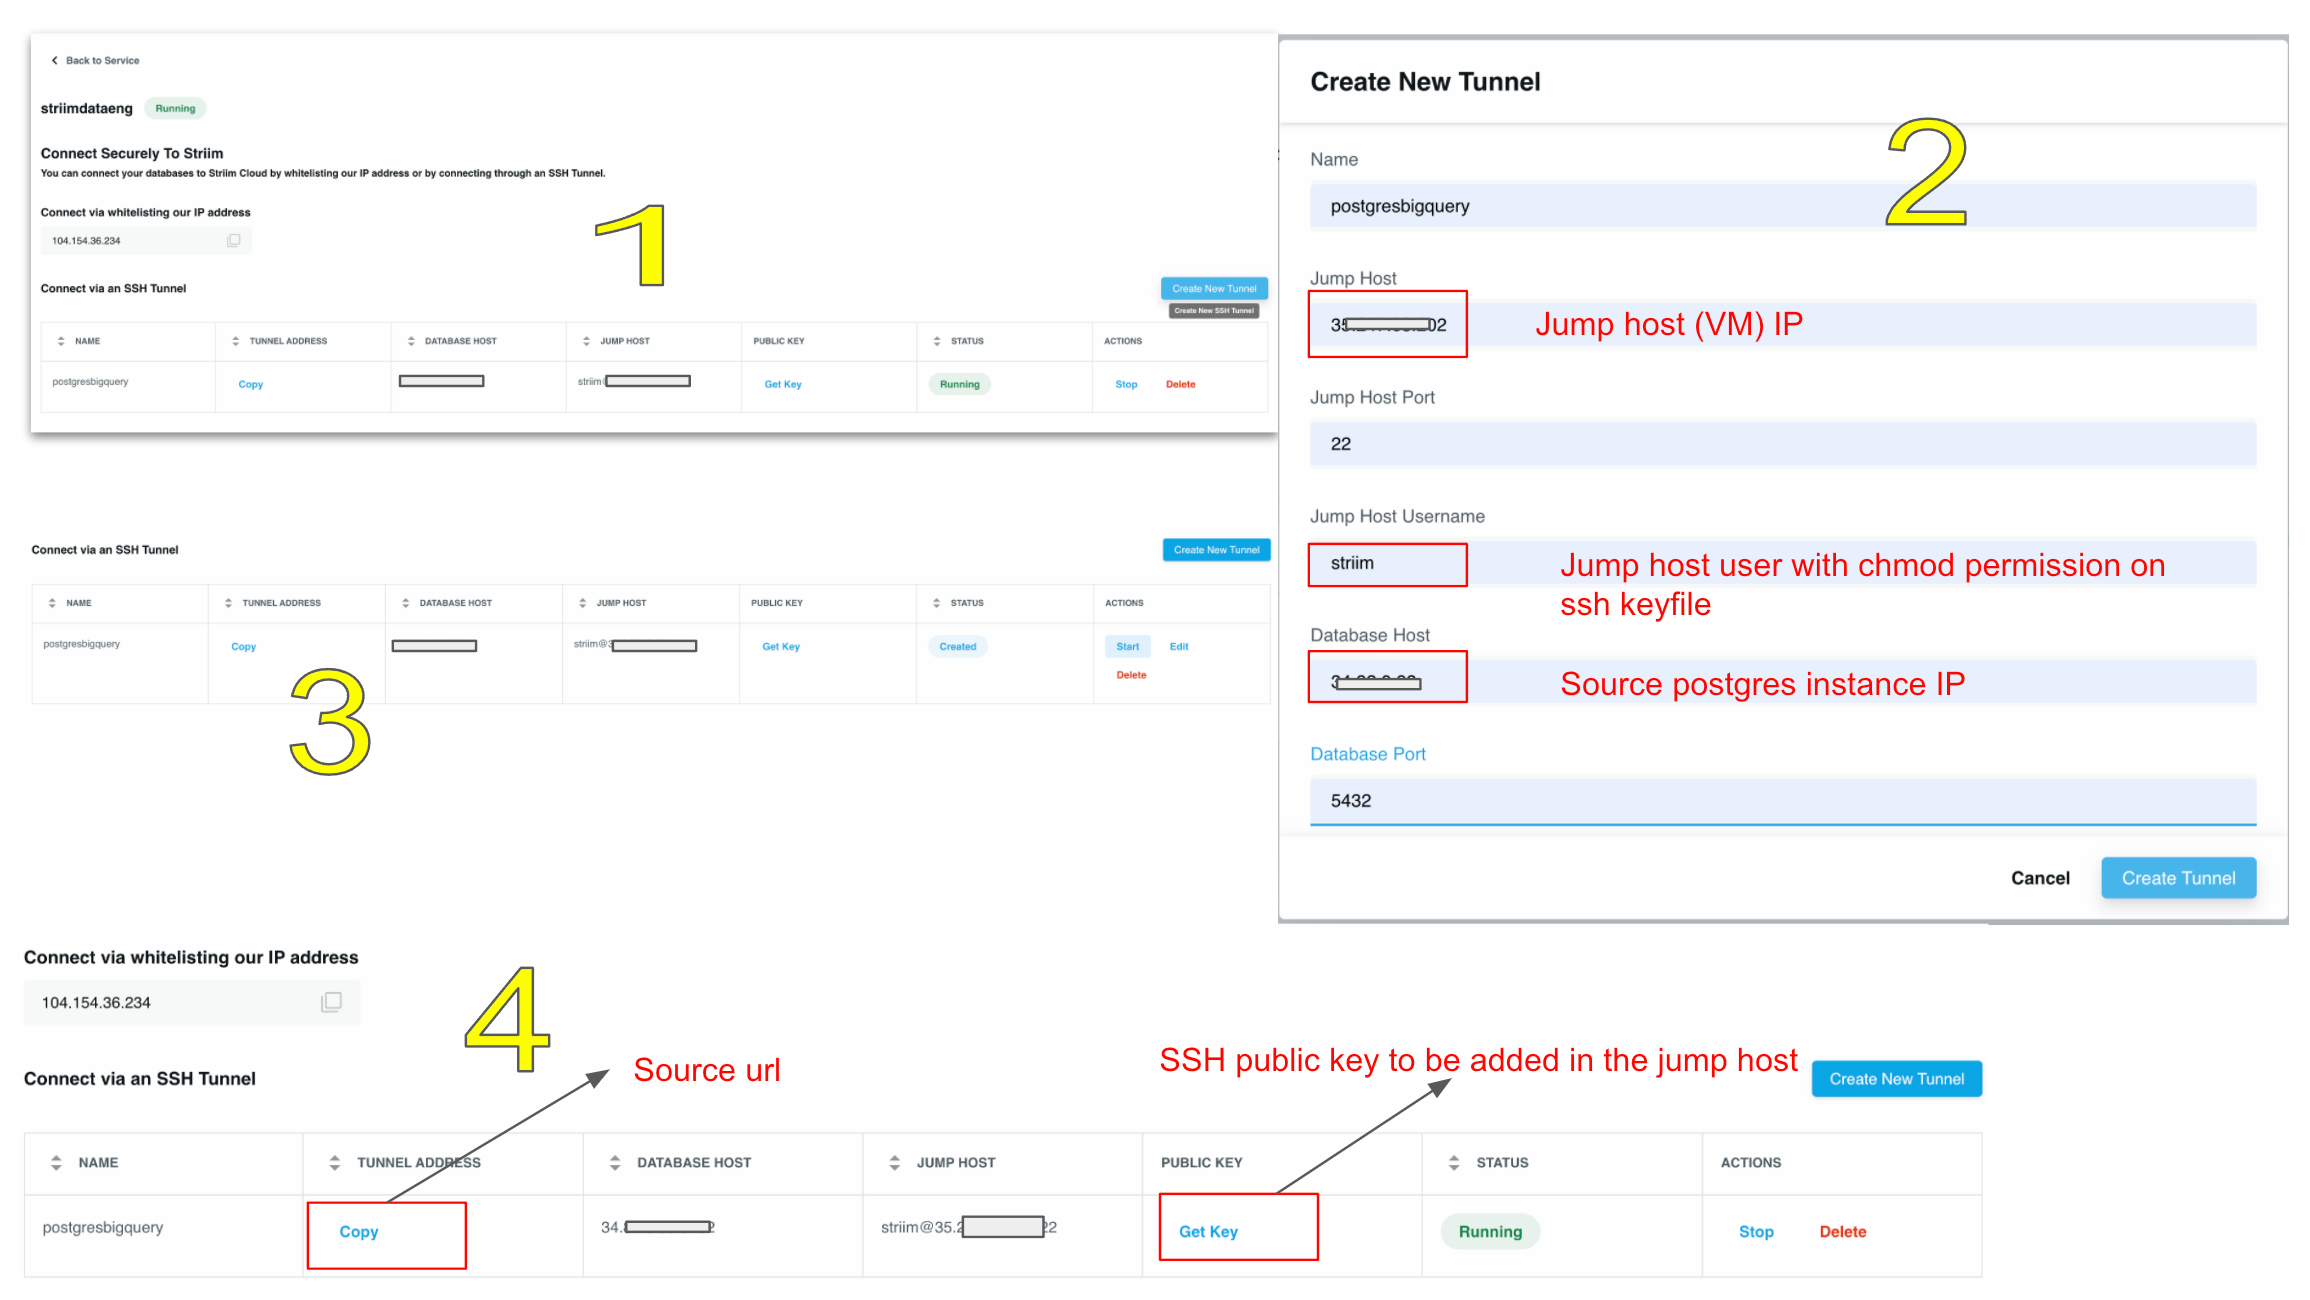
Once the jump host is set up, an SSH tunnel will be created from Striim Cloud UI to establish a connection to the source database through the jump server.
Follow the steps below to configure an SSH tunnel between source database and Striim cloud:
Go to striim cloud console and launch a service instance. Under security create a new SSH tunnel and configure it as below.
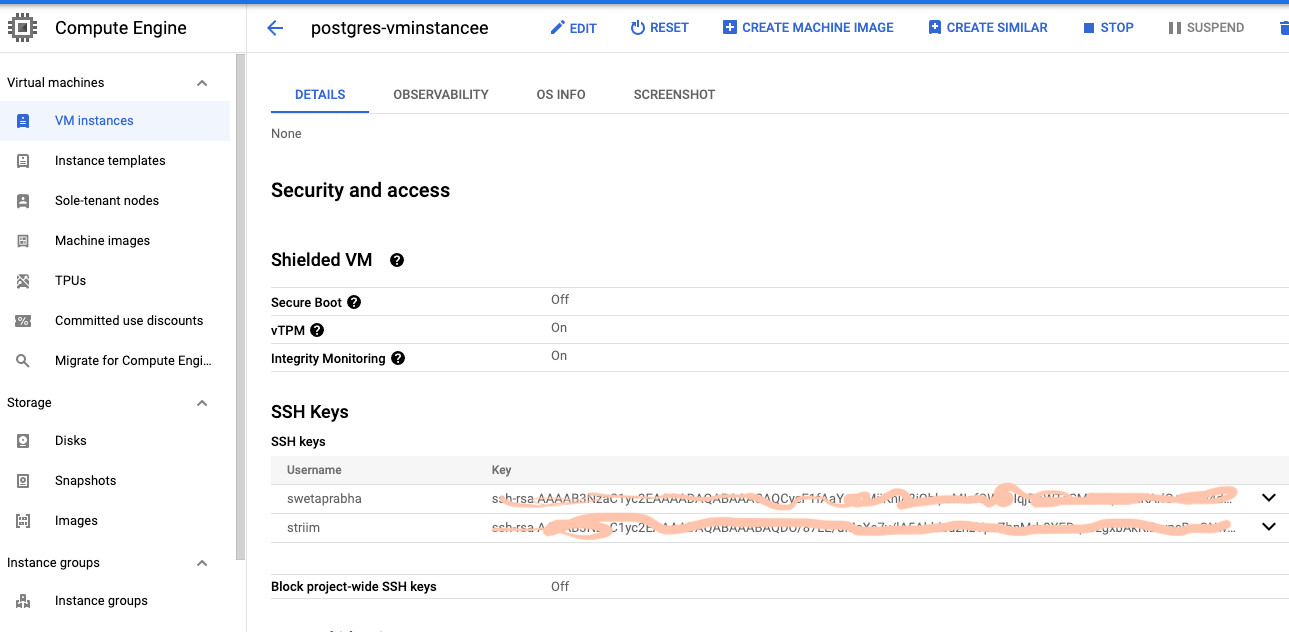
Go to jump server (VM instance) and add the service key copied from the above step’
Now Striim server is integrated with both postgres and Bigquery and we are ready to configure Striim app for data migration.
Step 3: Launch Striim Server and Connect the Postgres Instance
For this recipe, we will host our app in Striim Cloud but there is always a free trial to see the power of Striim’s Change Data Capture.
Follow the steps below to connect Striim server to postgres instance containing the source database:
Click on Apps to display the app management screen:
Click on Create app :
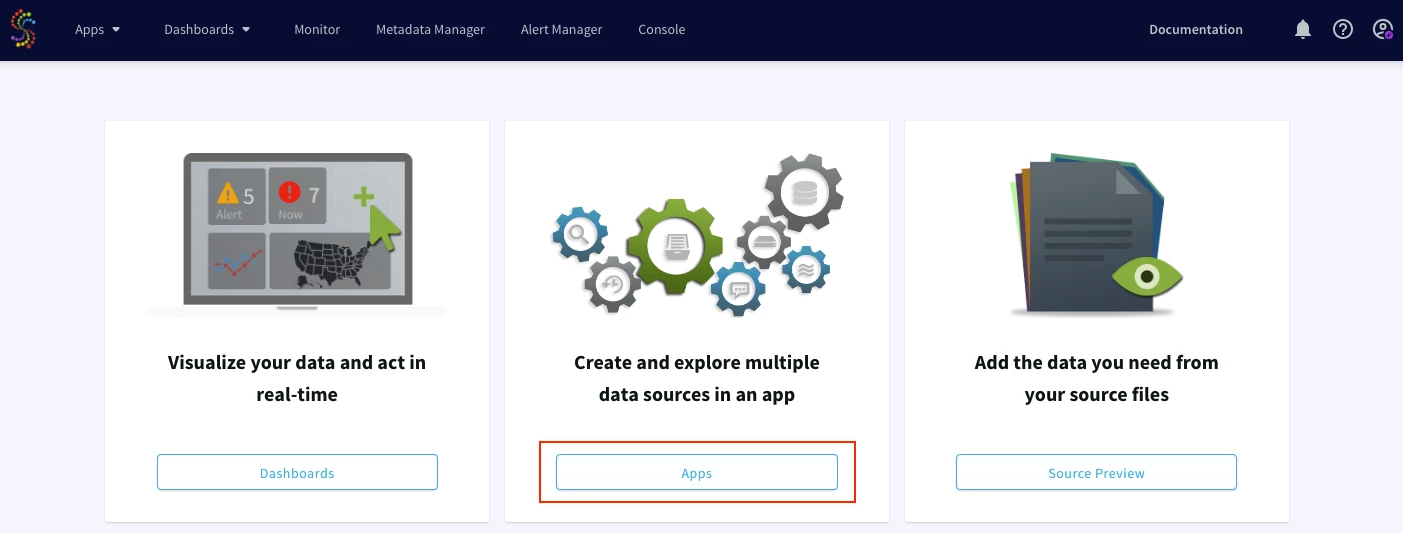
Select Source and Target under create app from wizard:

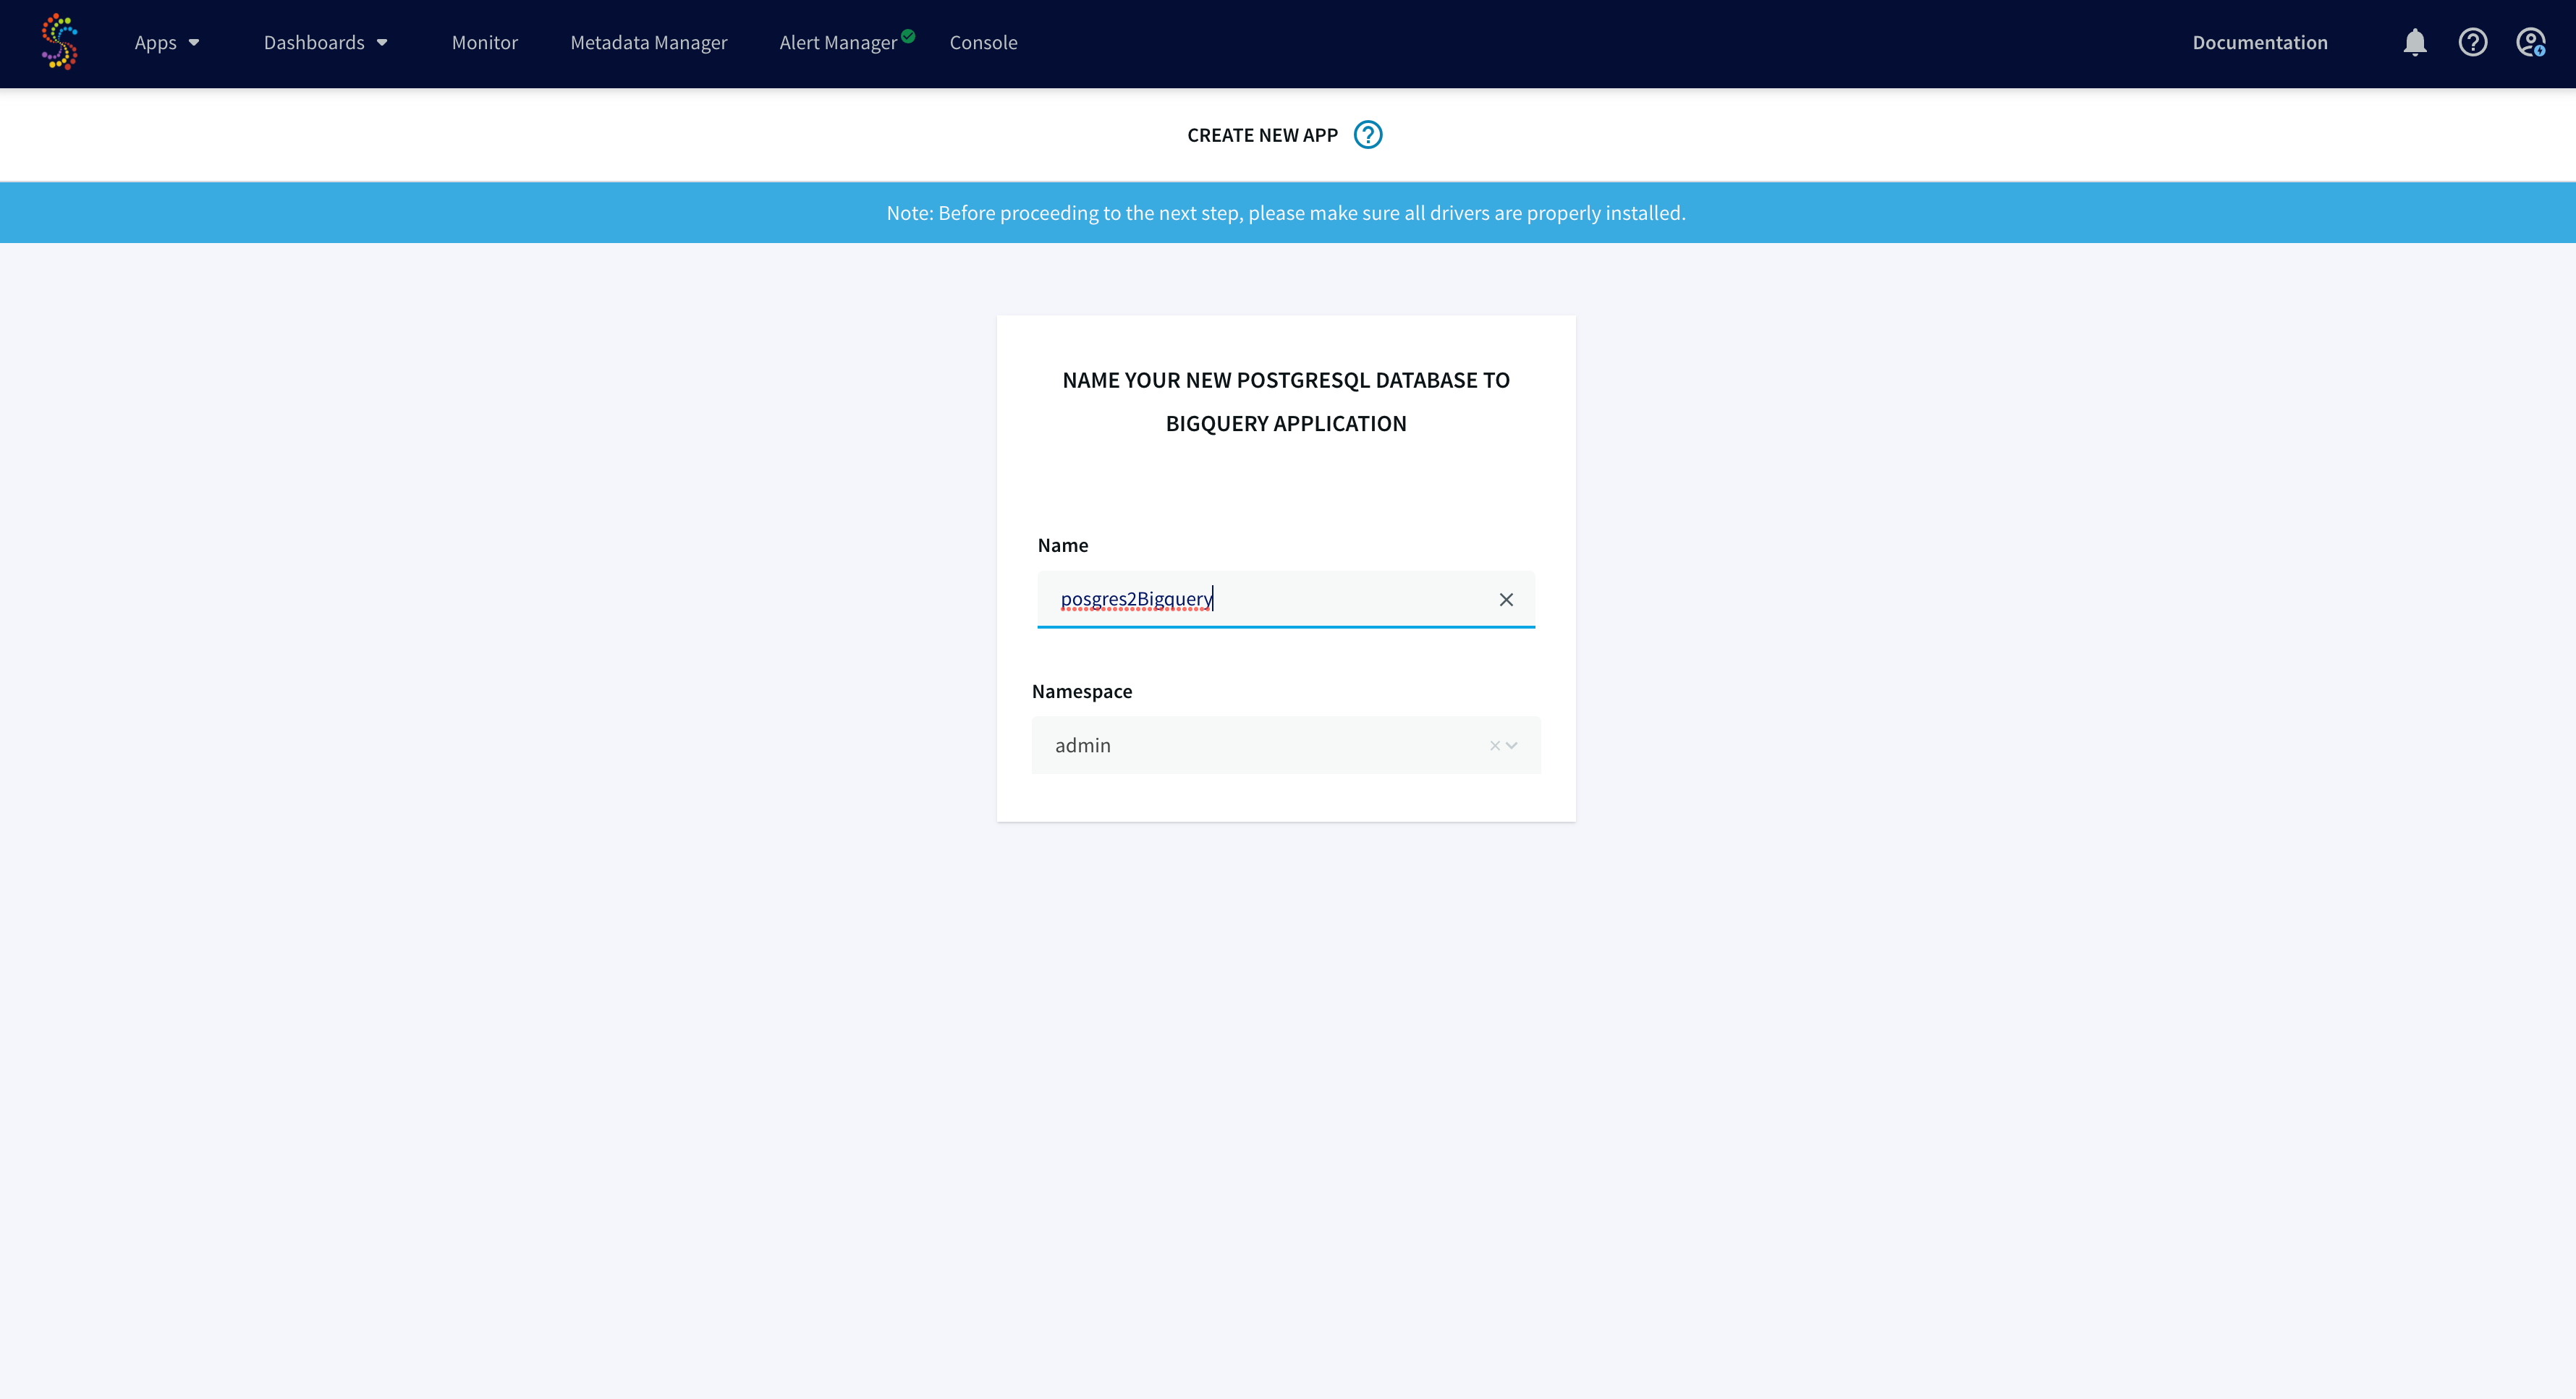
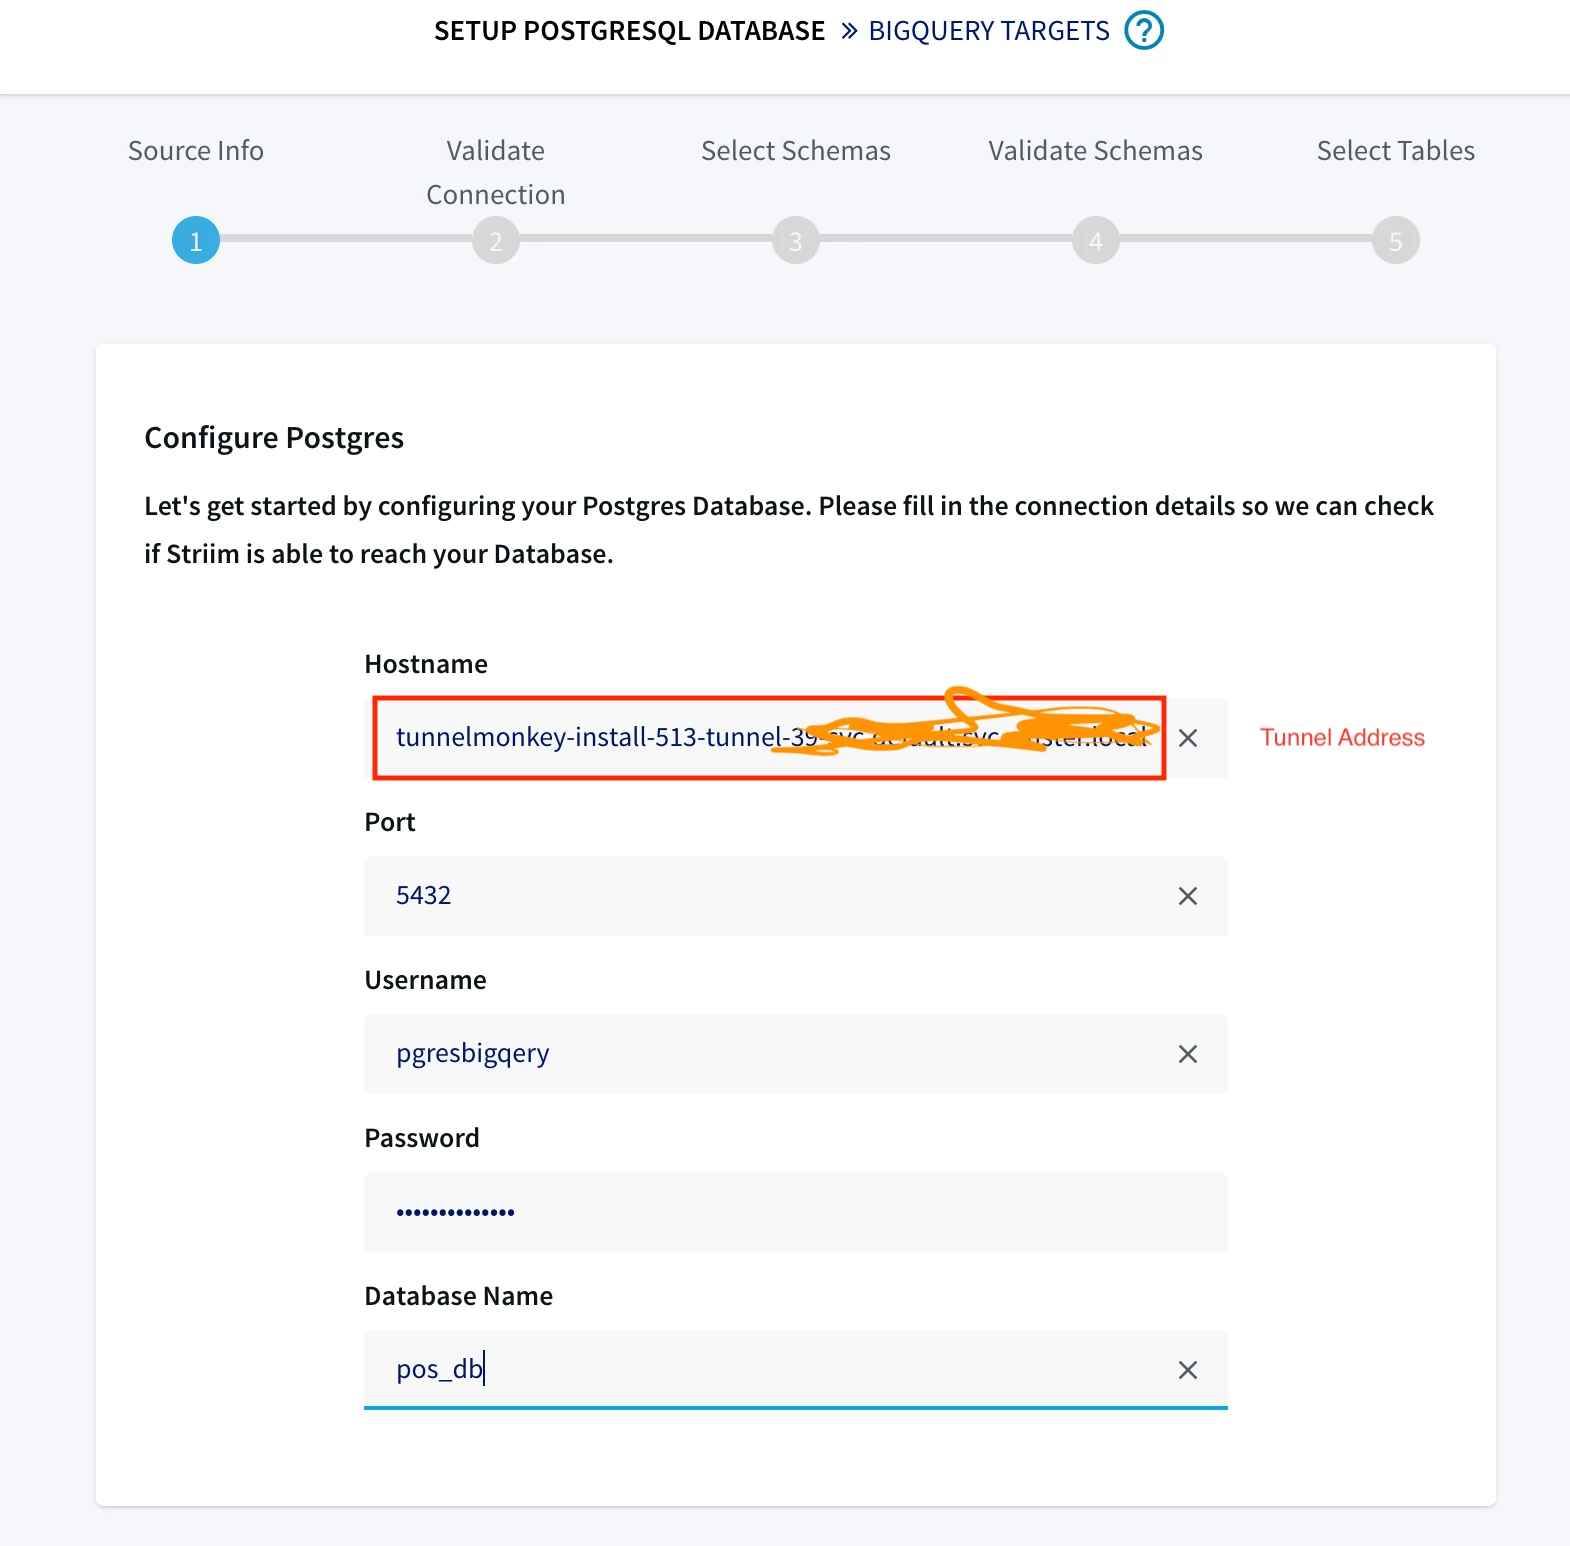
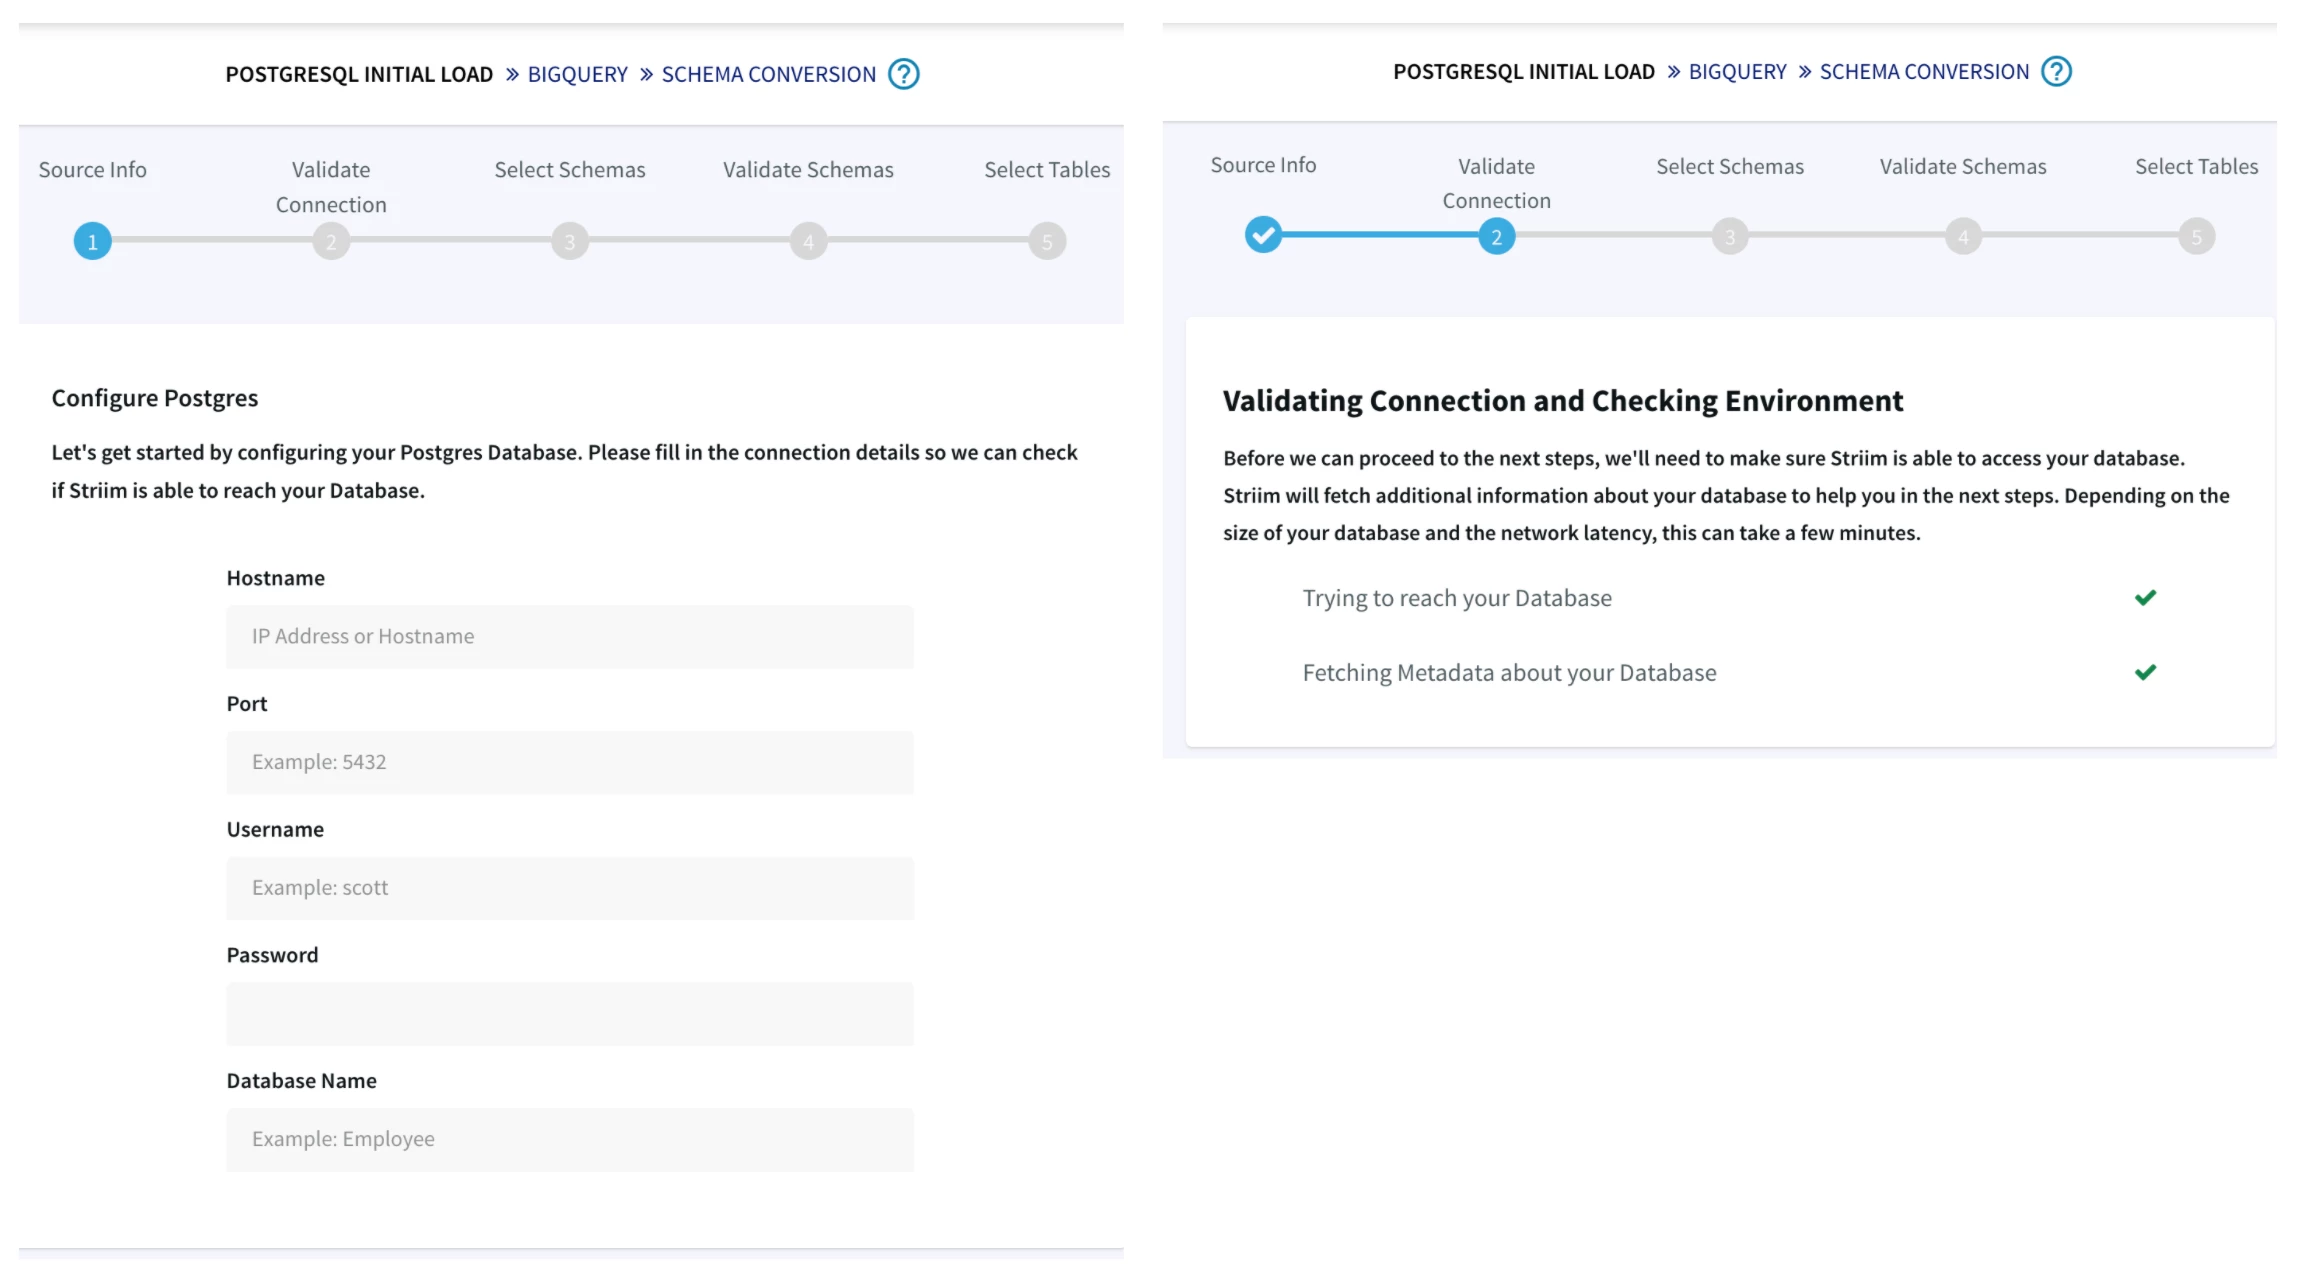
Give a name to your app and establish the connection between striim server and postgres instance.
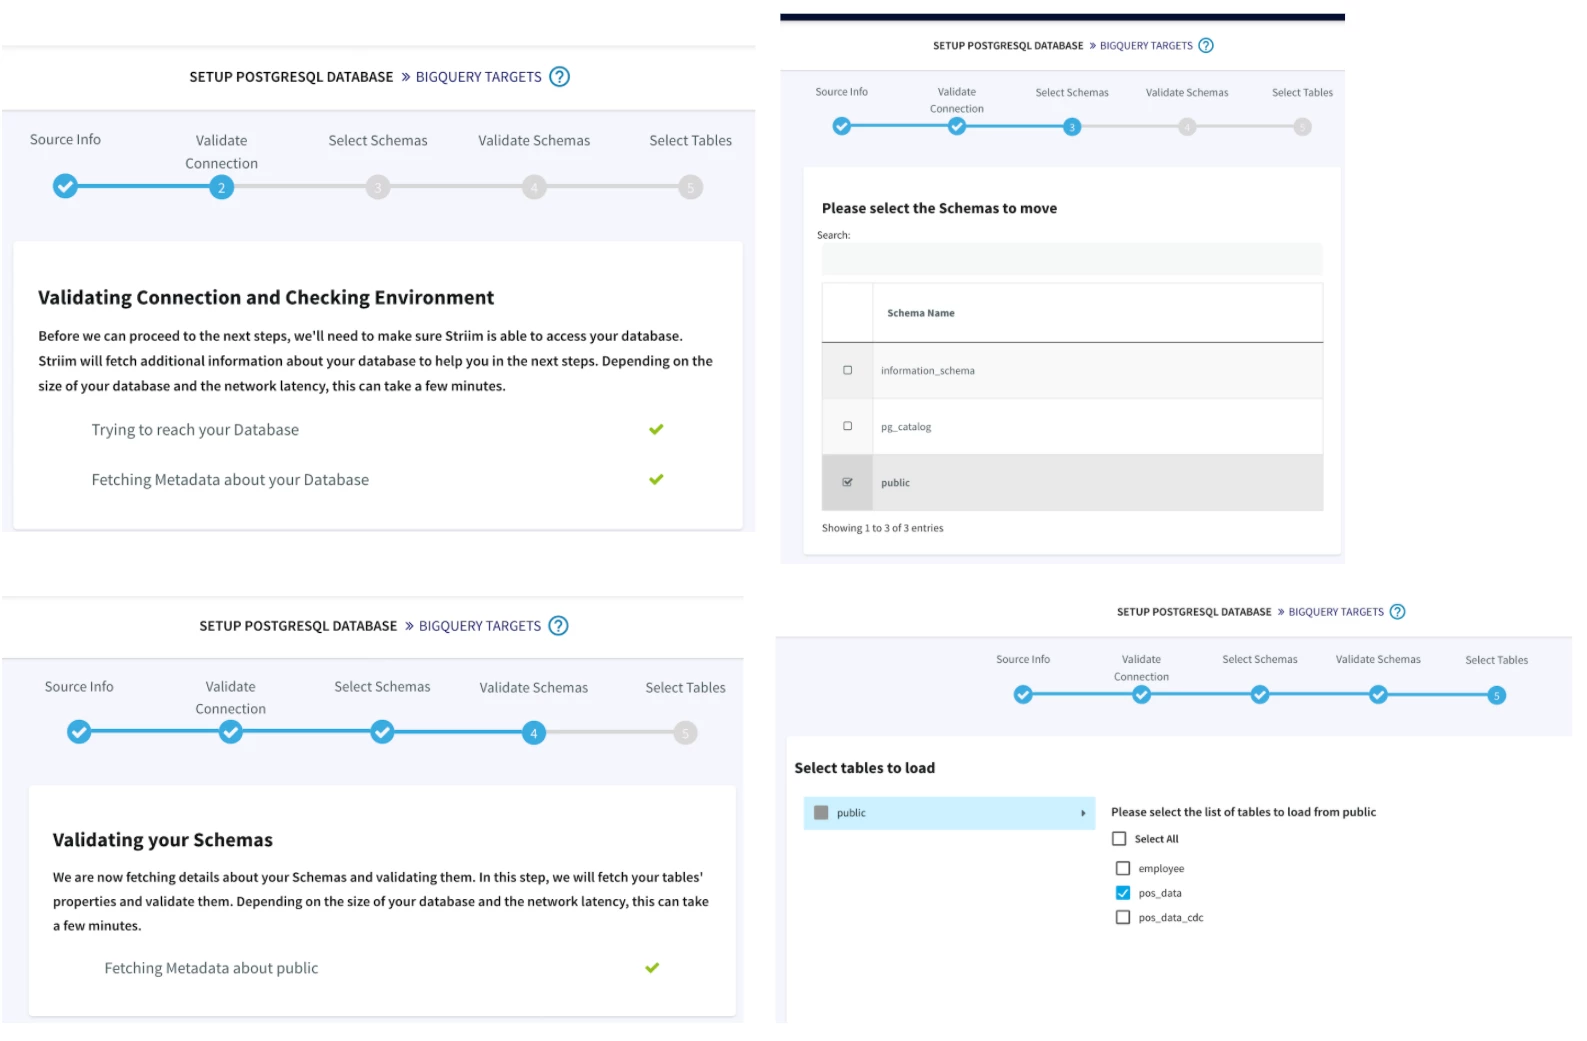
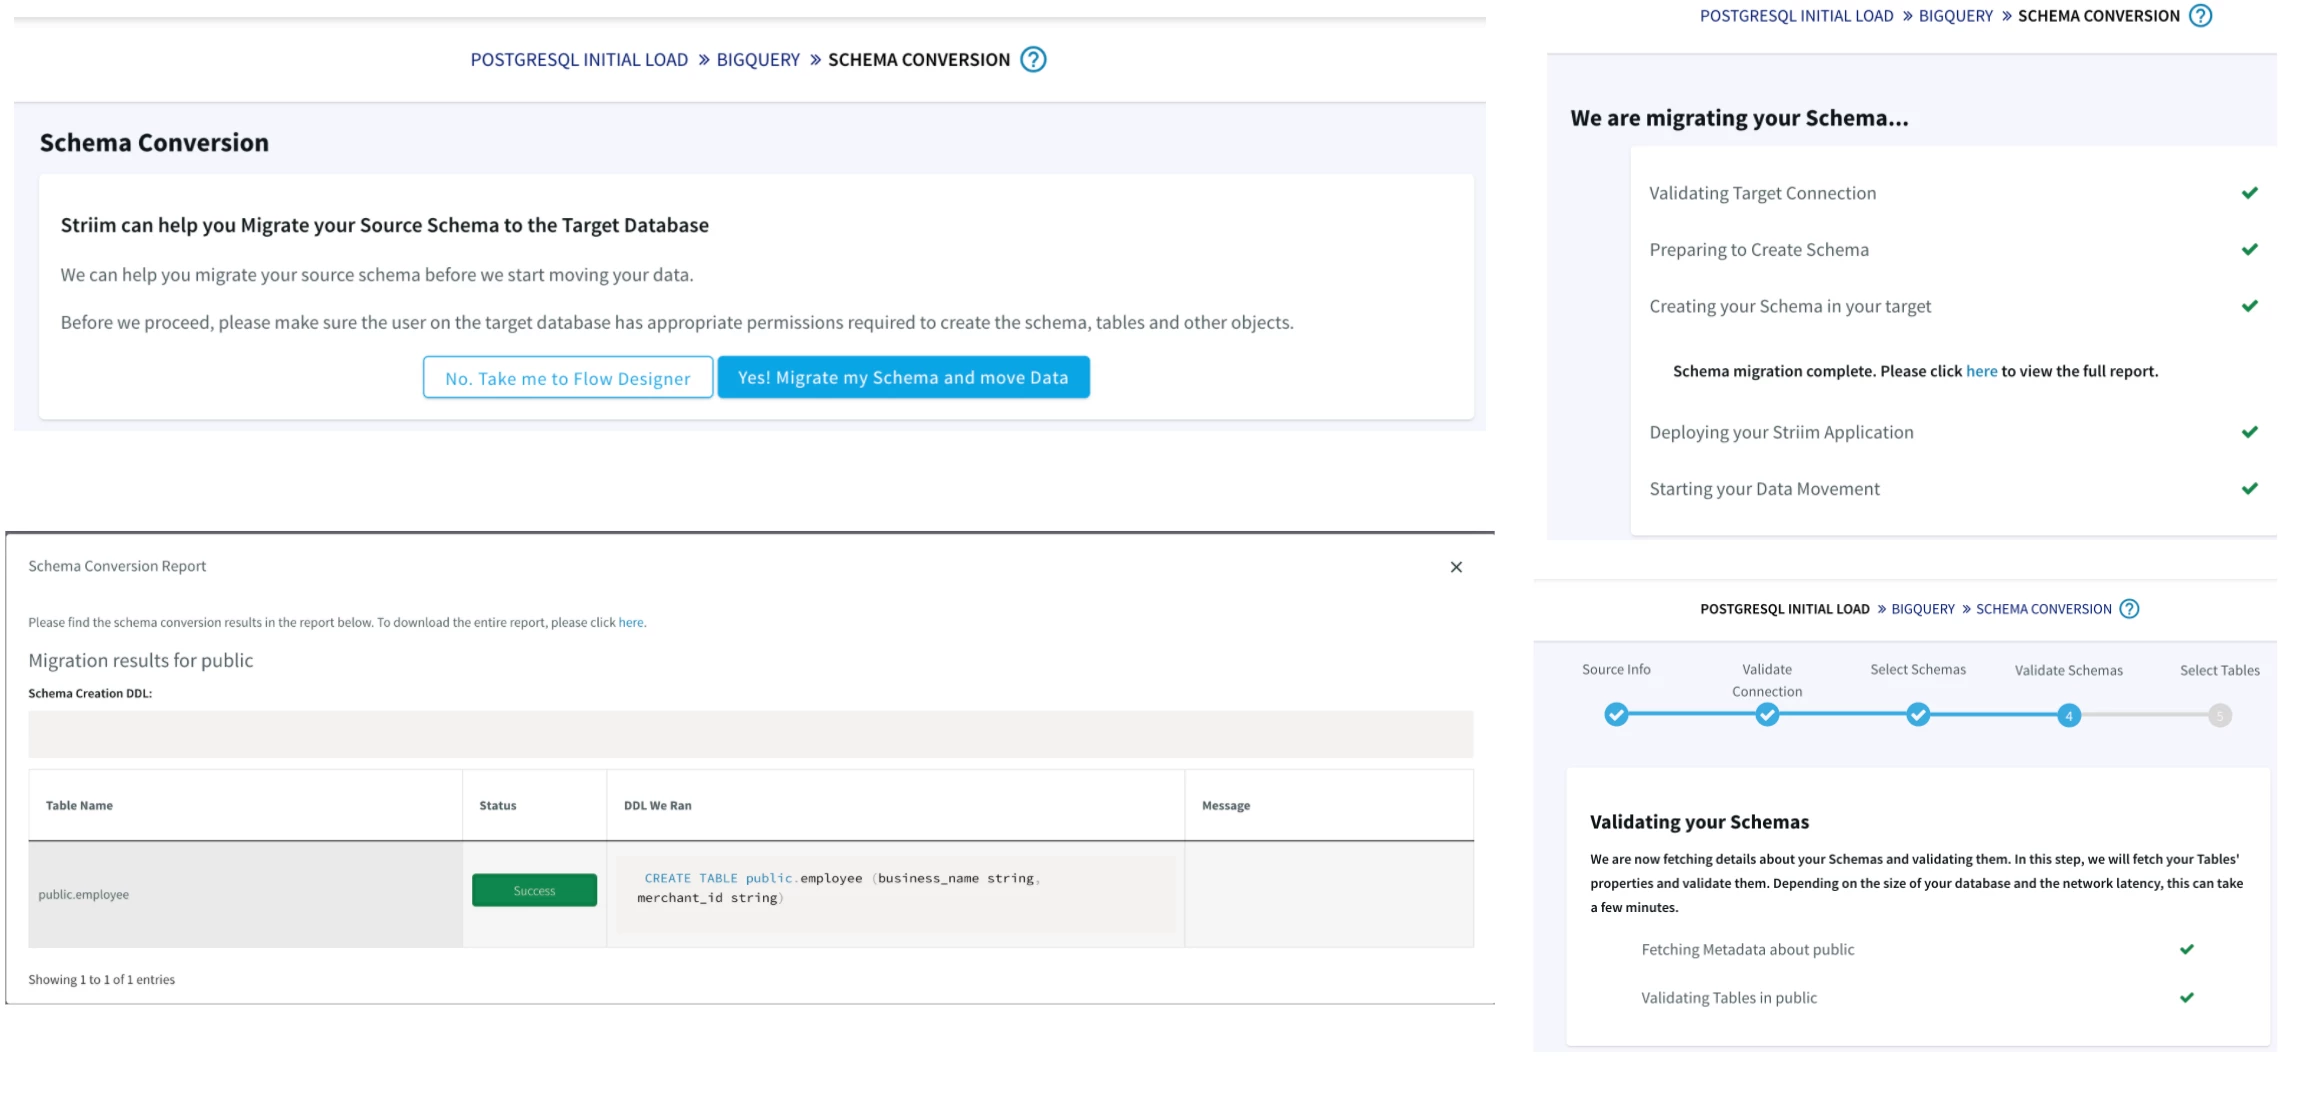
Once the connection between posgres and striim server is established, we will link the target data warehouse, in this case Google Bigquery. Striim also offers schema conversion feature where table schema can be validated for both source and target that helps in migration of source schema to the target database.
Step 4: Targeting Google Bigquery
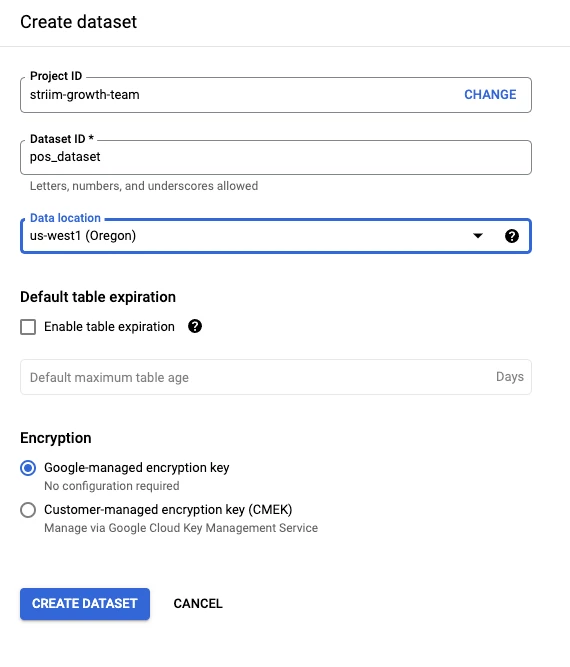
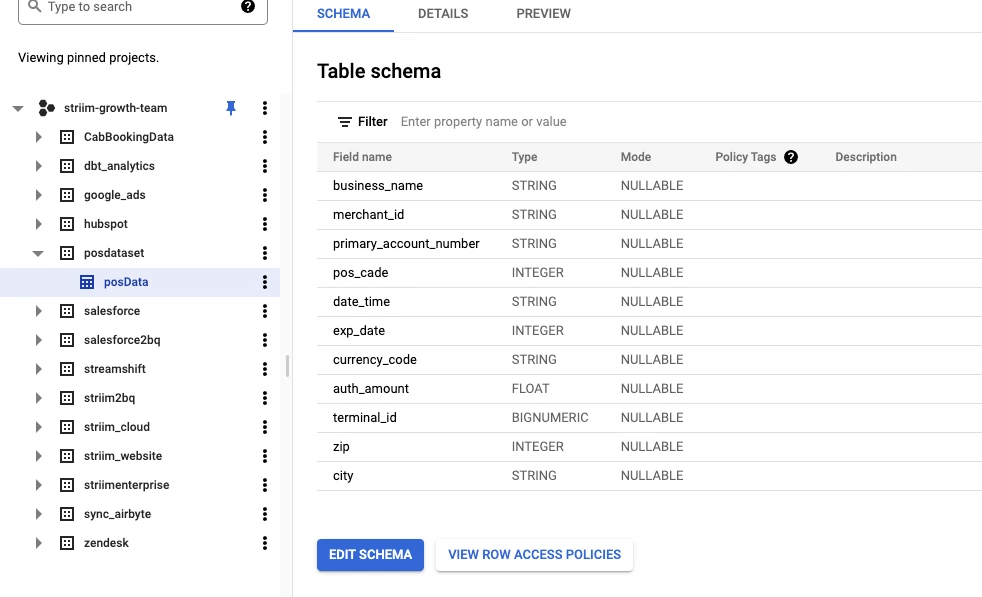
You have to make sure the instance of Bigquery mirrors the tables in the source database.This can be done from Google Cloud Console interface.Under the project inside Google Bigquery, create the dataset and an emty table containing all the columns that is populated with data migrated from postgres database.
Follow the steps below to create a new dataset in Bigquery and integrating with Striim app using a service account:
Create a dataset with tables mirroring the source schema.
Go back to app wizard and enter the service key of your BigQuery instance to connect the app with target data warehouse.
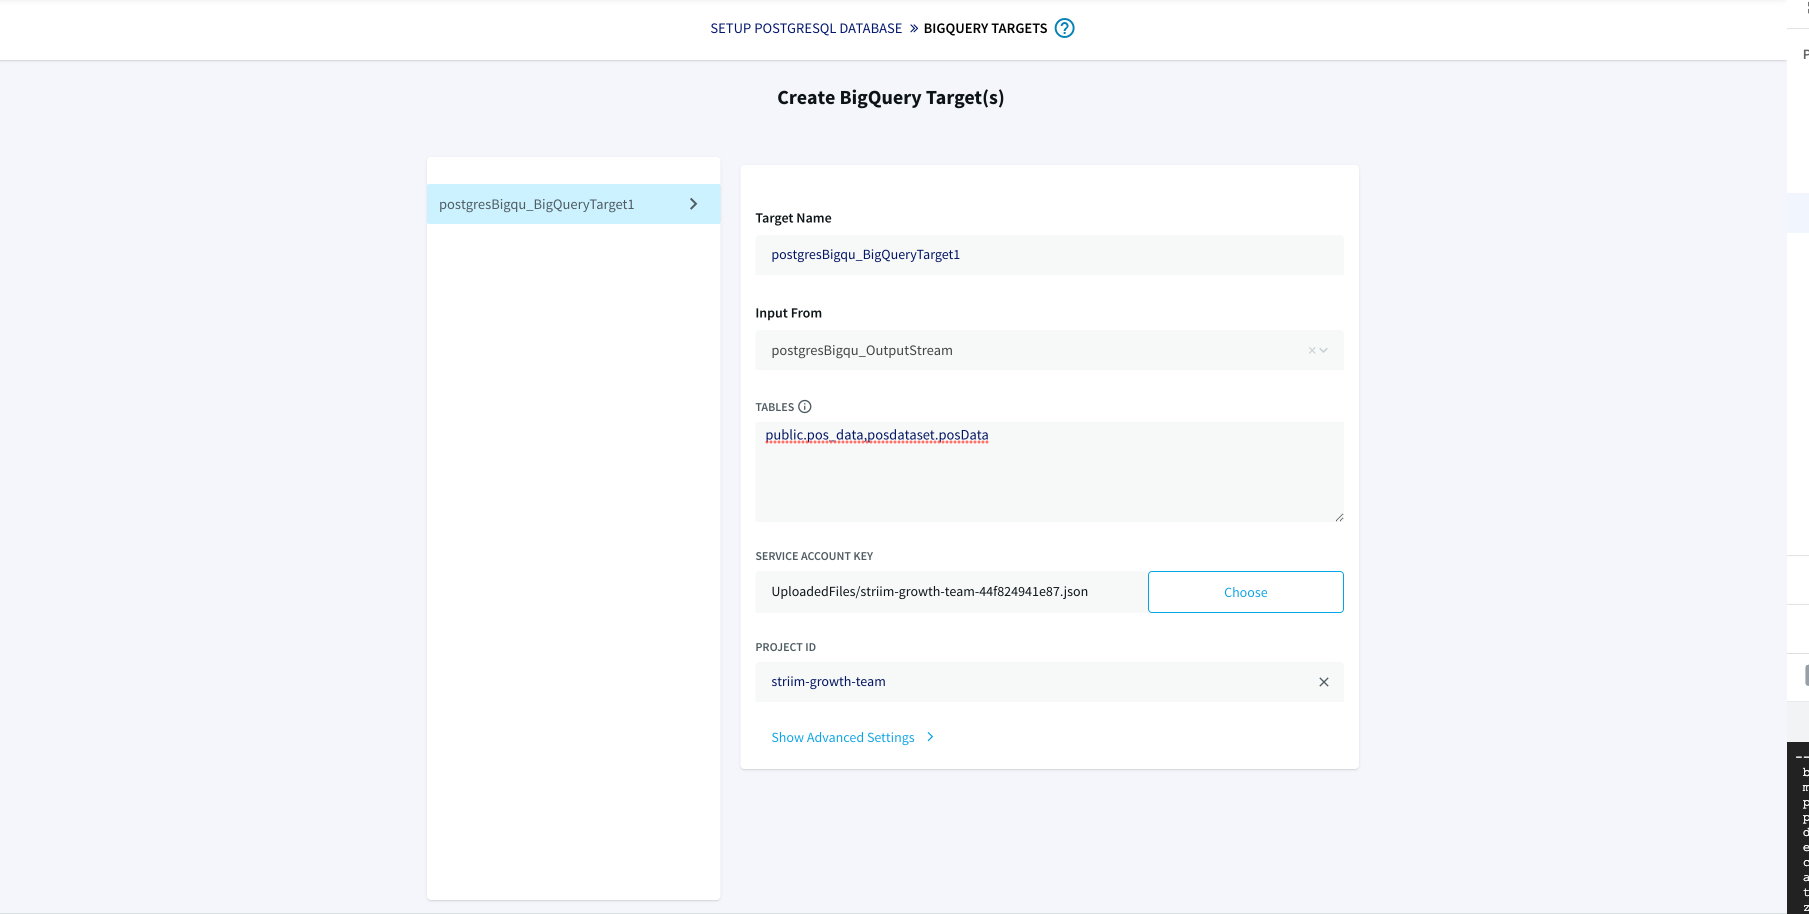
Now Striim server is integrated with both postgres and Bigquery and we are ready to configure Striim app for data migration.
Step 5: Configure Striim app using UI
With source, target and Striim server integrated for data migration, a few configuration on the easy to understand app UI is made before deploying and running the app.
- Click on source and add the connection url (tunnel address), user name and password in proper format:
- Click on target and add the input stream, source and target tables and upload the service key for Bigquery instance
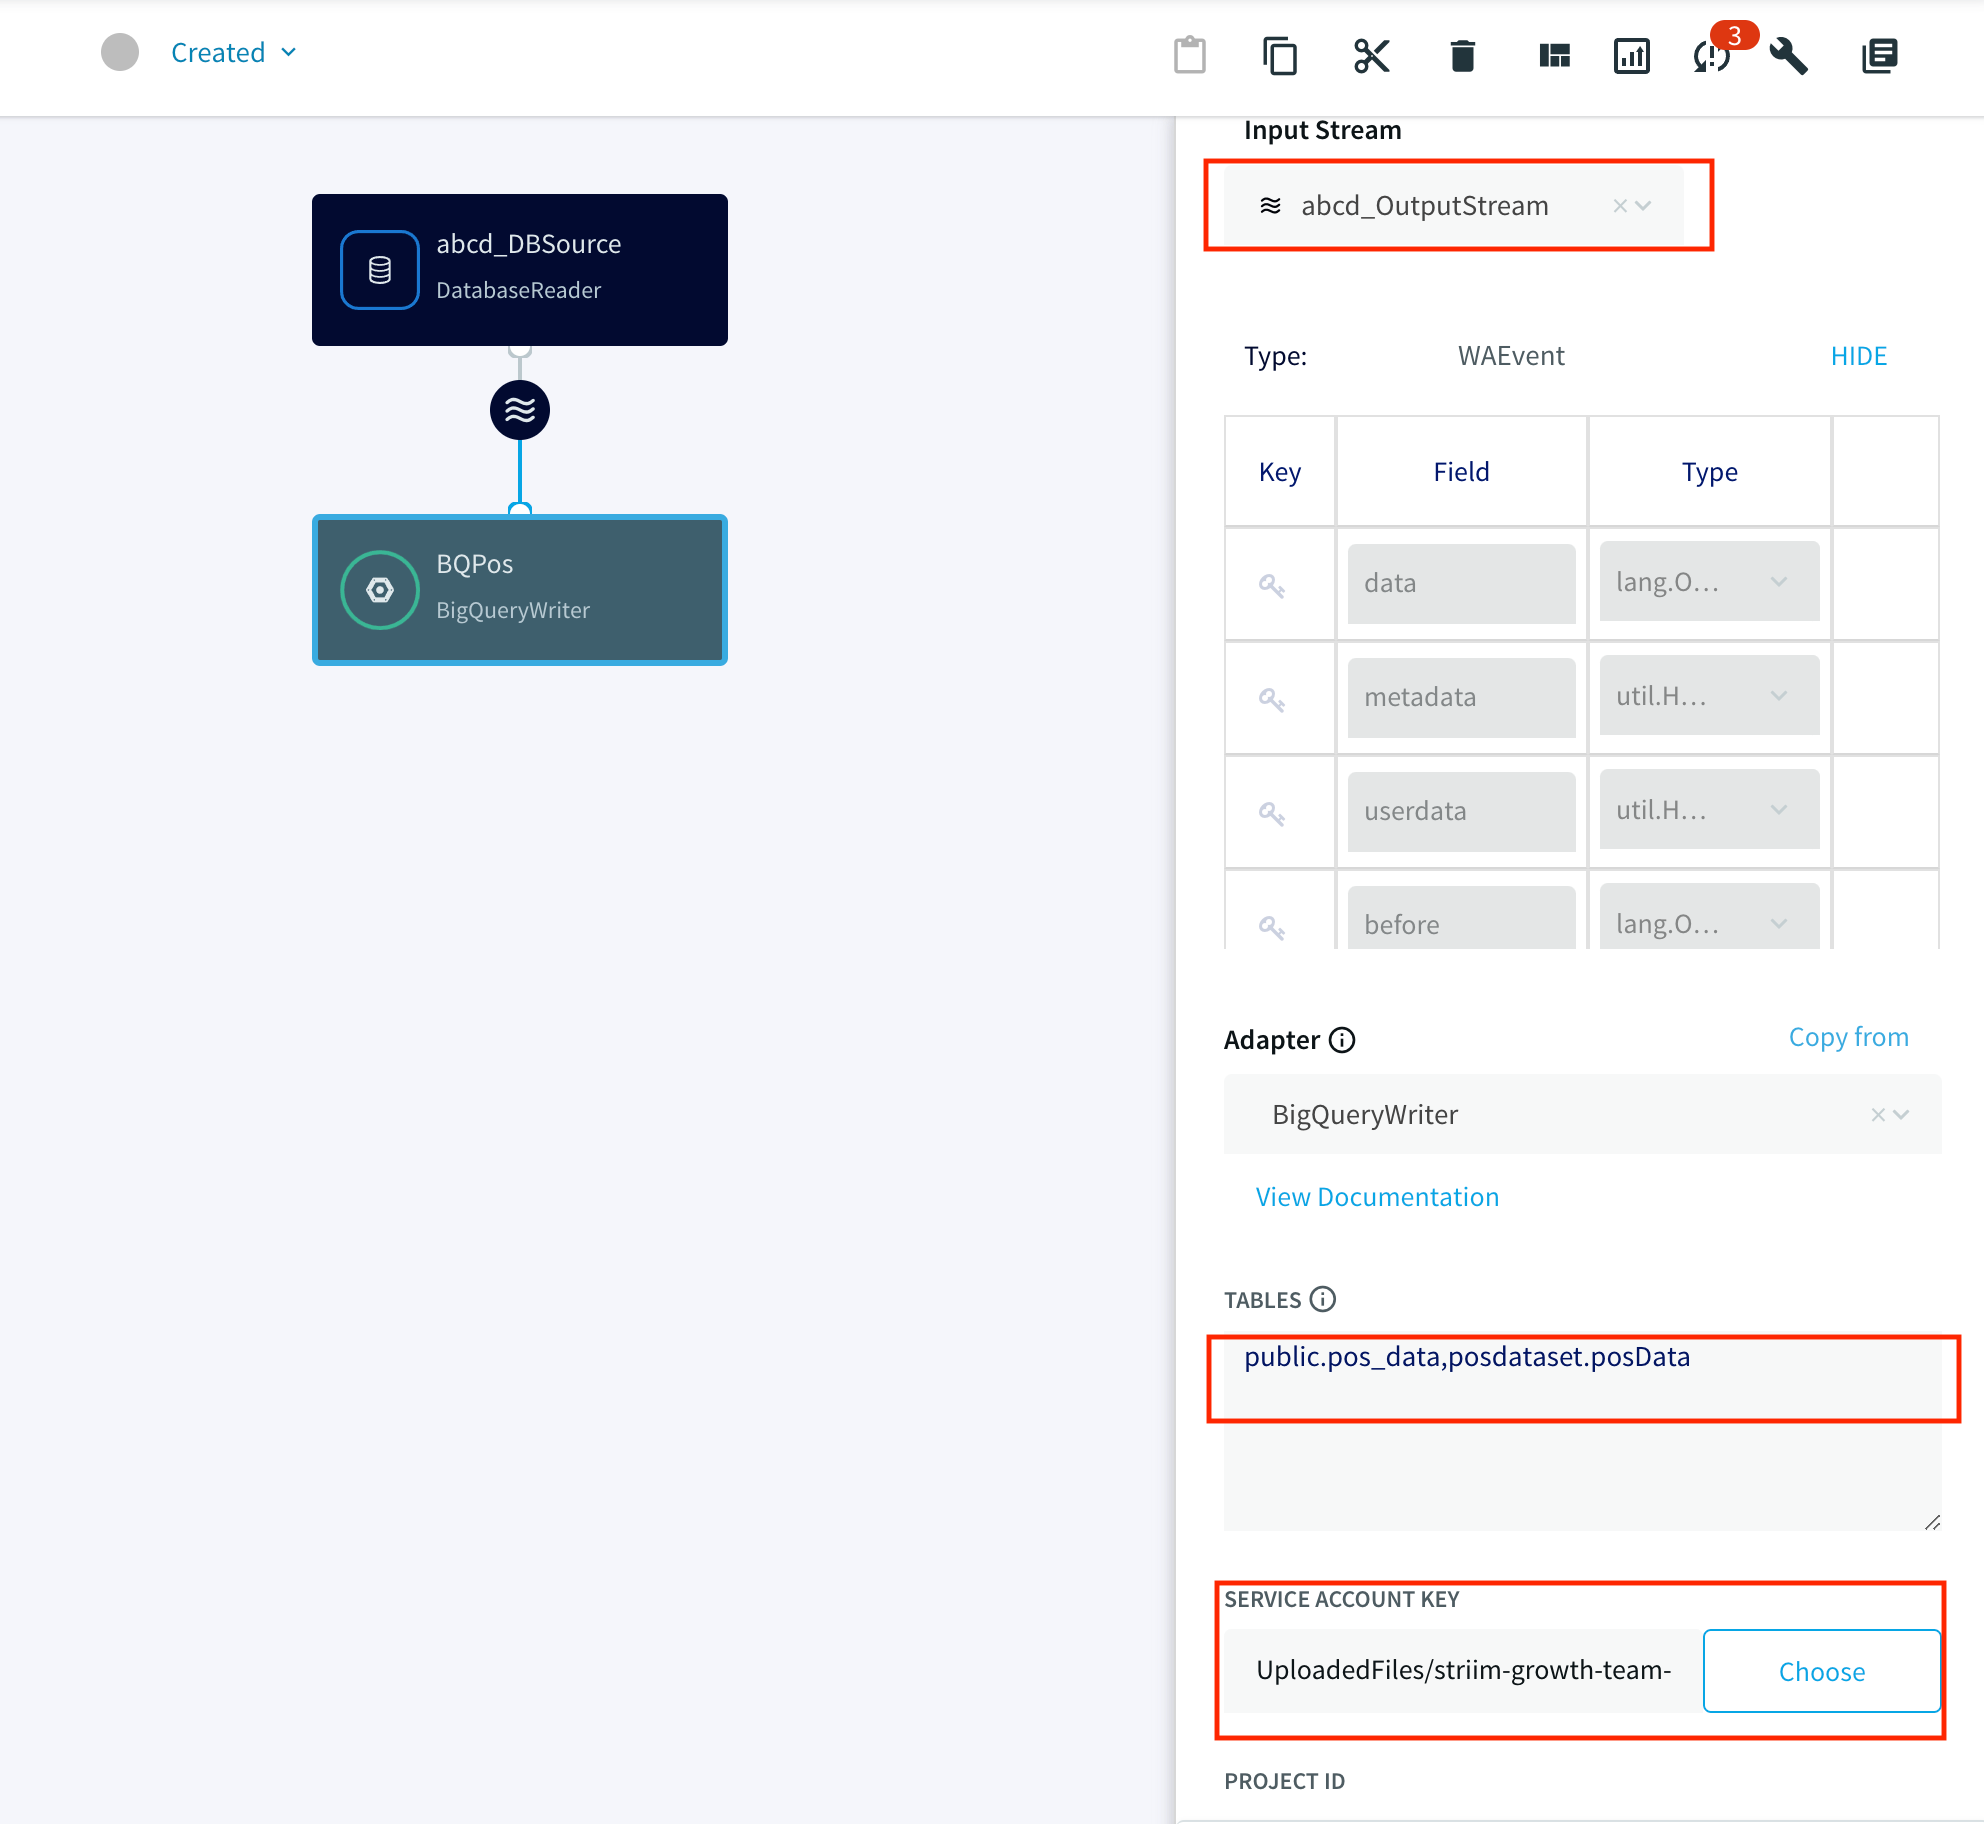
Now the app is good to go for deployment and data migration.
Step 6: Deploy and Run the Striim app for Fast Data Migration
In this section you will deploy and run the final app to visualize the power of Change Data Capture in Striim’s next generation technology.
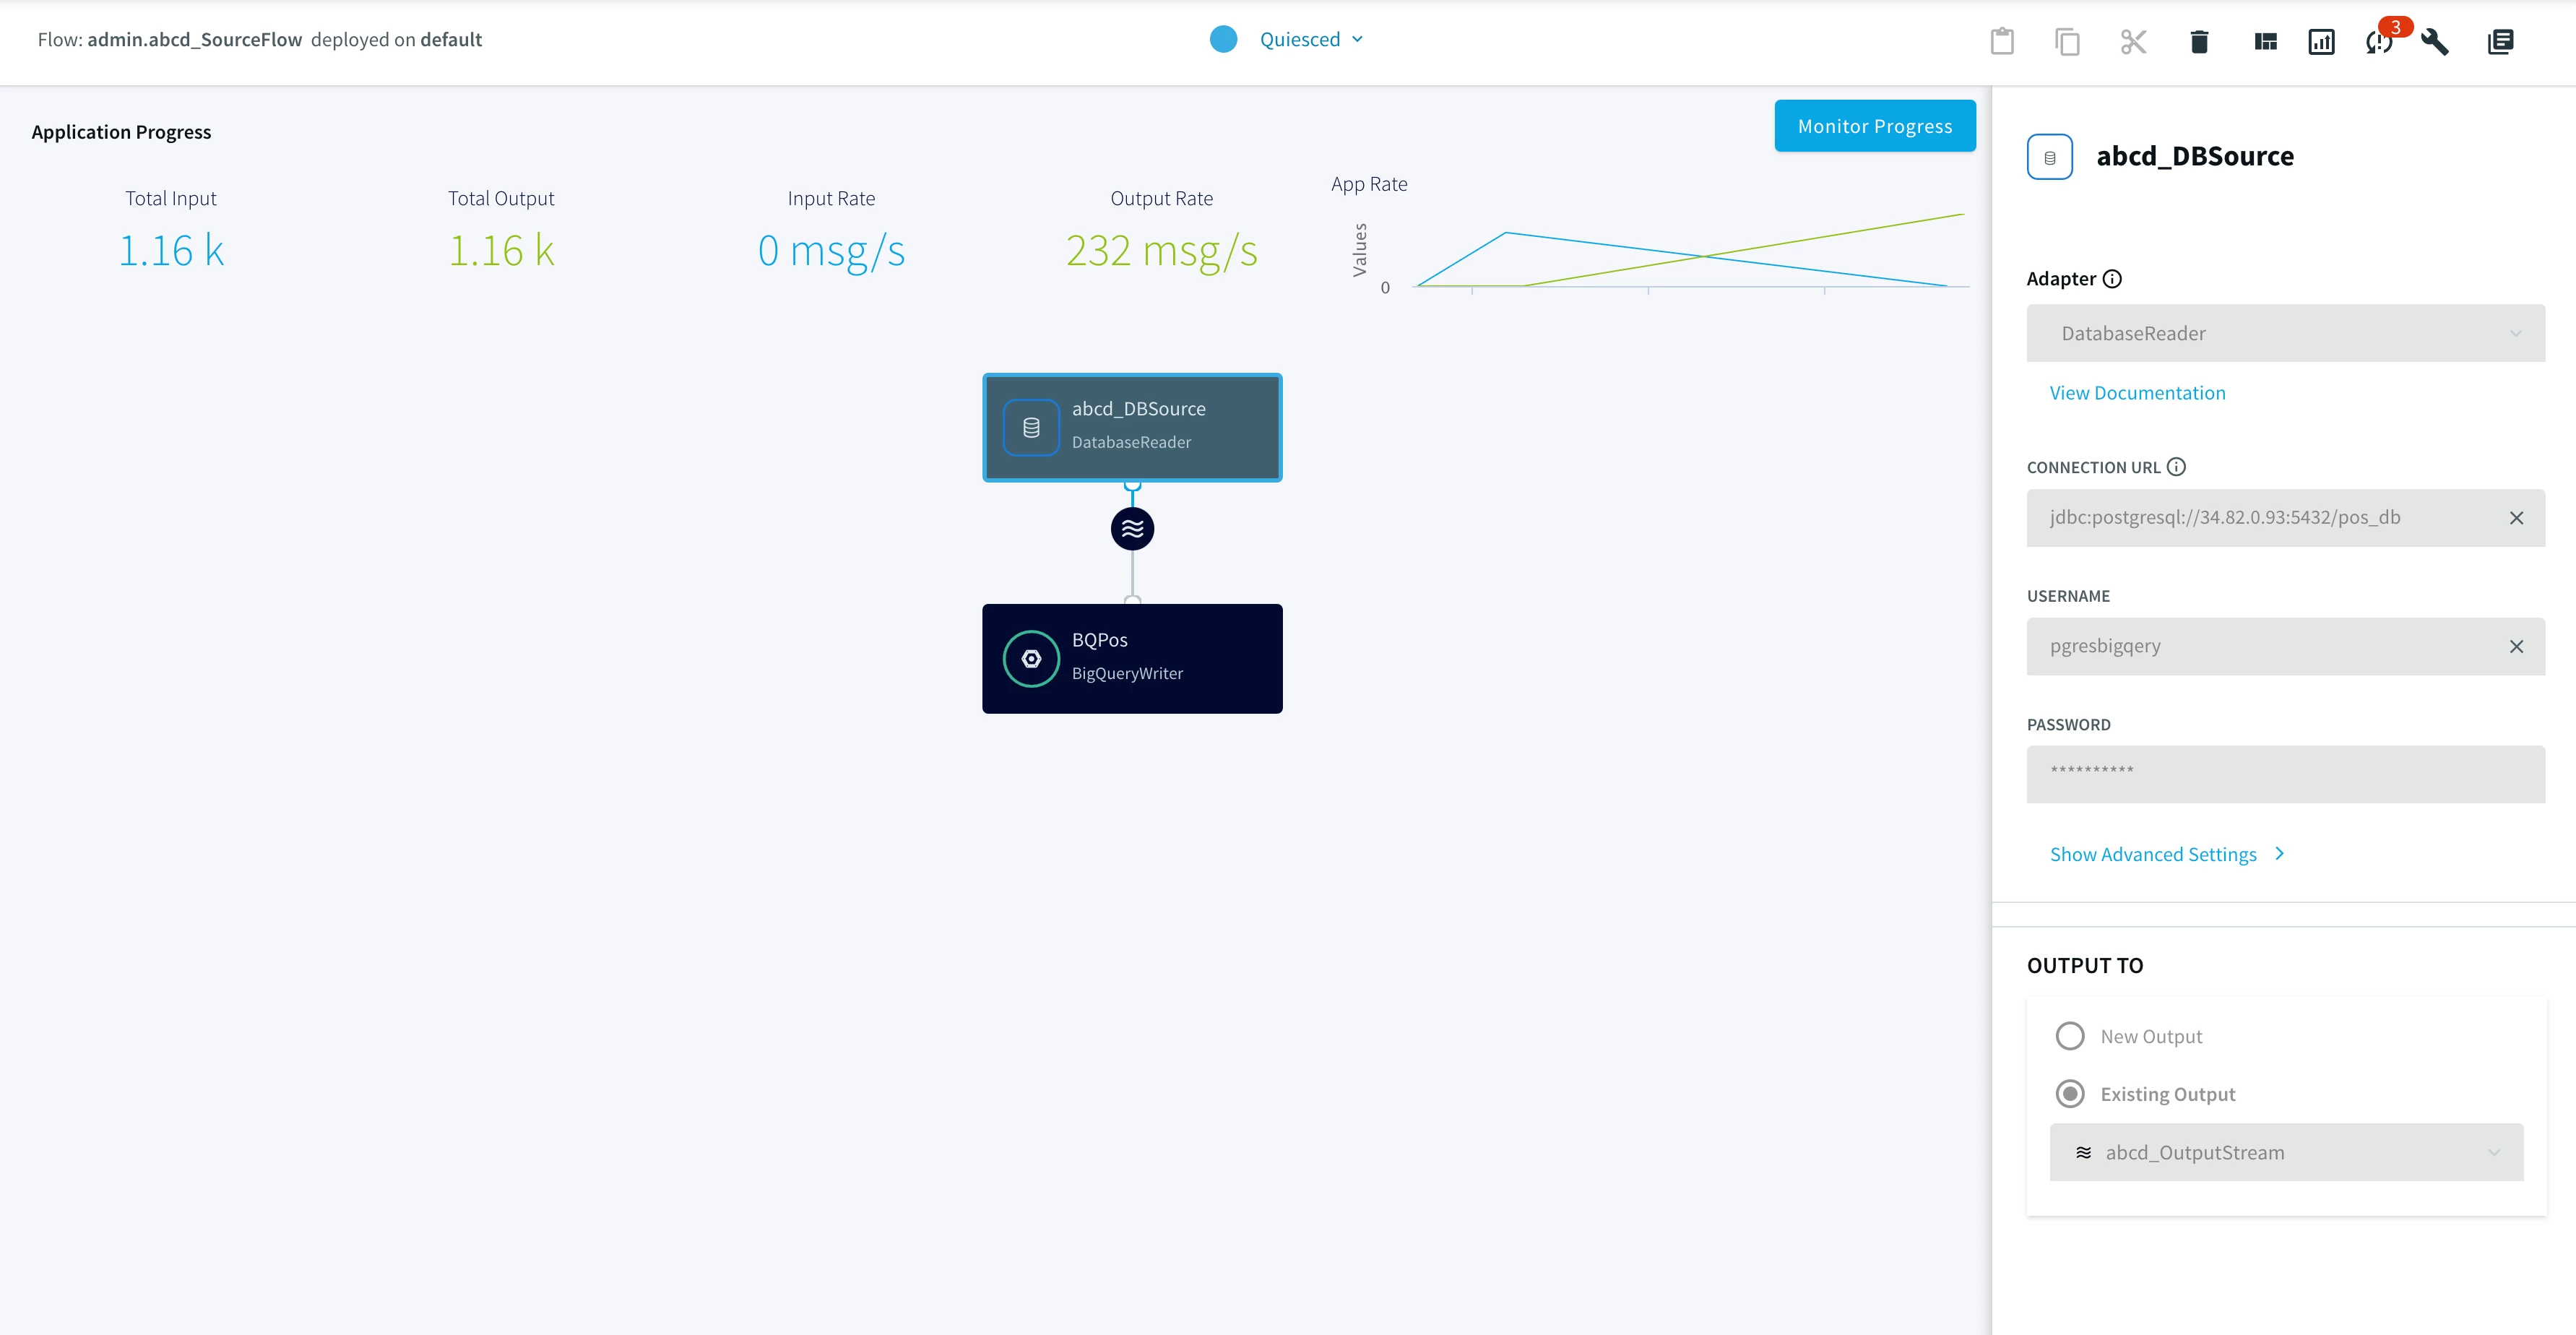
Setting up the Postgres to BigQuery Streaming App
Step 1: Follow the recipe to configure your jump server and SSh tunnel to Striim cloud.
Step 2: Set up your Postgres Source and BigQuery Target.
Step 3: Create Postgres to BQ Striim app using wizard as shown in the recipe
Step 4: Migrate your data from source to Target by deploying your striim app
Wrapping Up: Start Your Free Trial
Our tutorial showed you how easy it is to migrate data from PostgreSQL to Google BigQuery, a leading cloud data warehouse. By constantly moving your data into BigQuery, you could now start building analytics or machine
learning models on top, all with
minimal impact to your current systems. You could also start ingesting and normalizing more datasets with Striim to fully take advantage of your data when combined with the power of BigQuery.
As always, feel free to reach out to our integration experts to schedule a demo, or try Striim for free here.


